How to setup user login through LDAP Server
Using the internal company server to load users onto an FME file can speed up the process and at the same time, control who is able to login to the FME file. The administrator of the FME file is the only one who can set this function. Using the LDAP Server to login, means that users must enter their company username and password to access the FME file. Furthermore, if the administrator deselects this function, the previous settings in “Teams and persons” will automatically apply.
Click below to see the whole step by step explanation with screenshots on how to set this up
Step 1
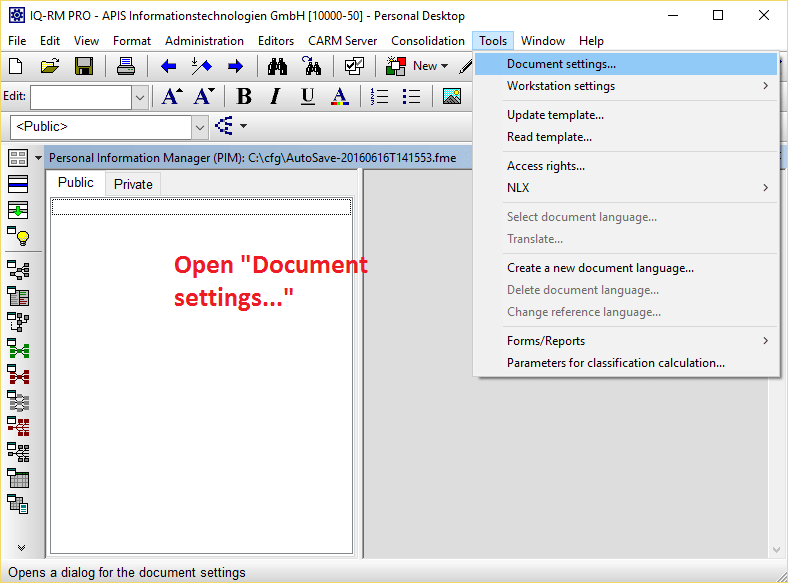
Open an FME file and the go to “Tools | Document settings…”
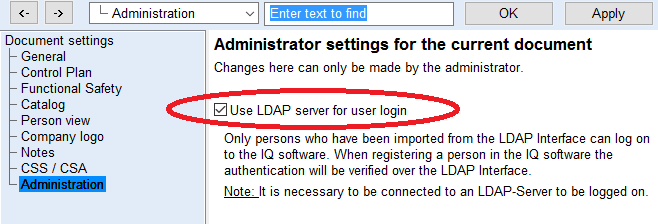
Step 2
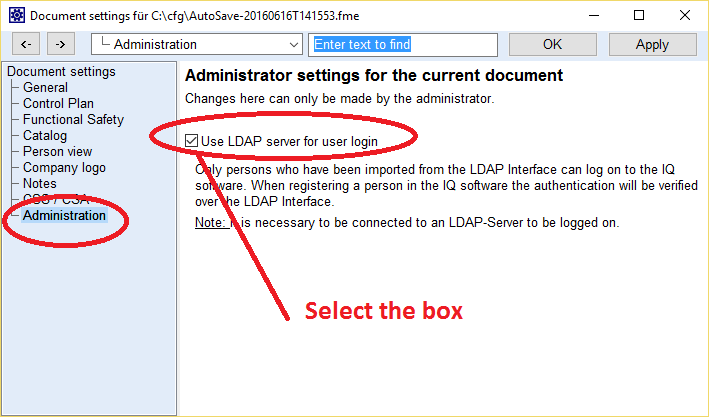
Click on “Administration” and select the box. Then click “OK”
Step 3
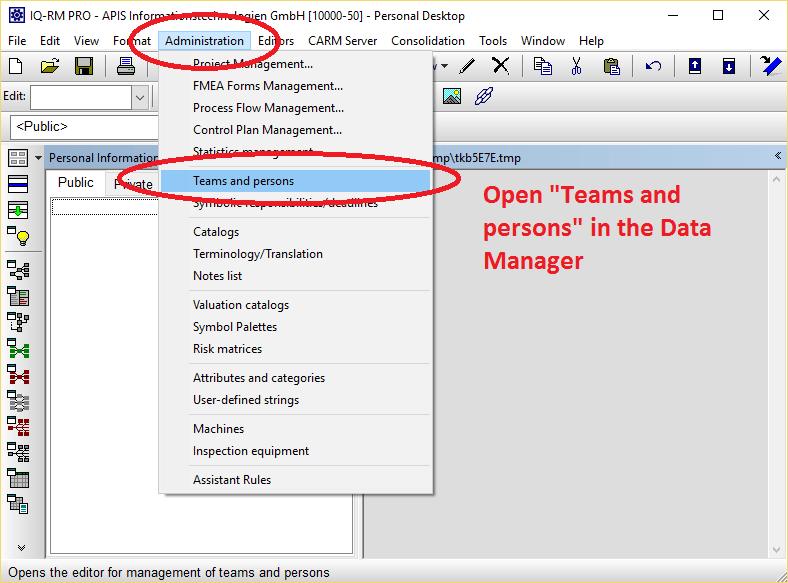
Go to the Data Manager by clicking on “Administration | Teams and persons”
Step 4
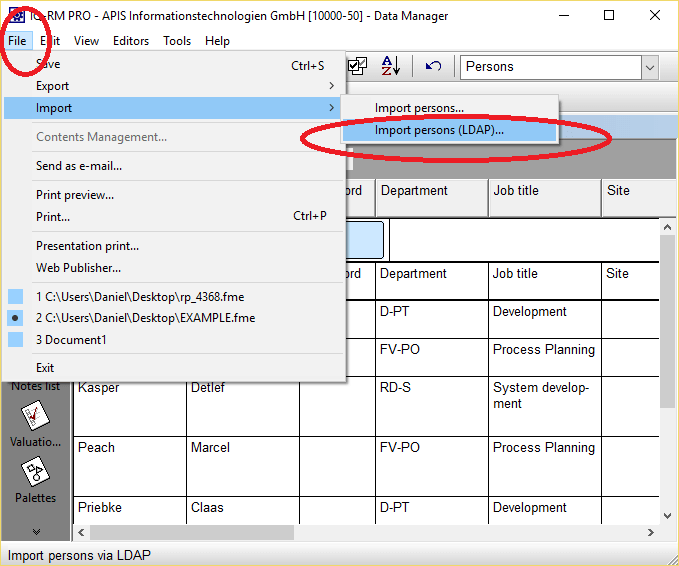
Click on “File | Import | Import persons (LDAP)…”
Step 5
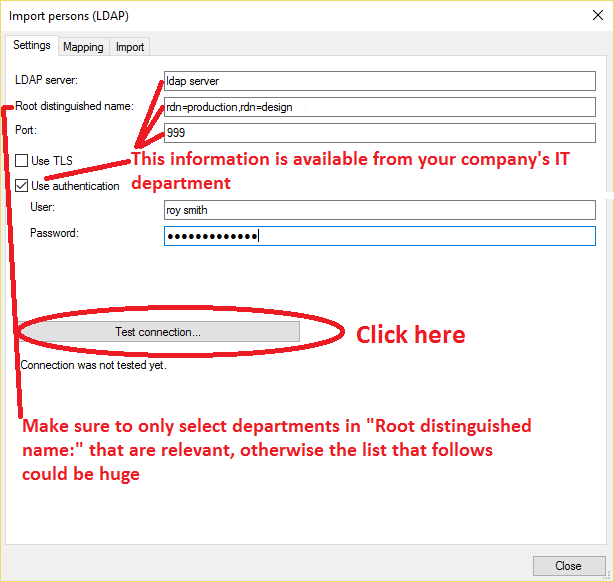
Enter in the LDAP Server name, RDN, Port, and if necessary also the username and password. This information can be obtained from your company IT department. Make sure to only enter the departments in RDN if possible, otherwise the list that displays after clicking “Test connection” could be huge.
Step 6
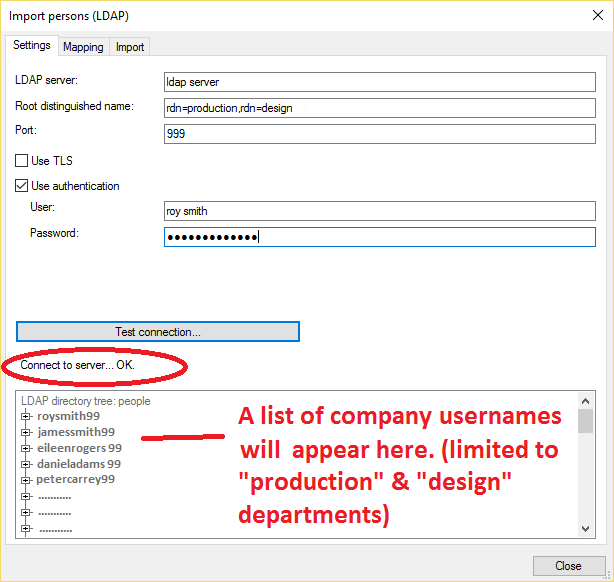
If the connection is successful, a list of company usernames will be displayed. This list will be limited to the commands in the “Root distinguished name:”
Step 7
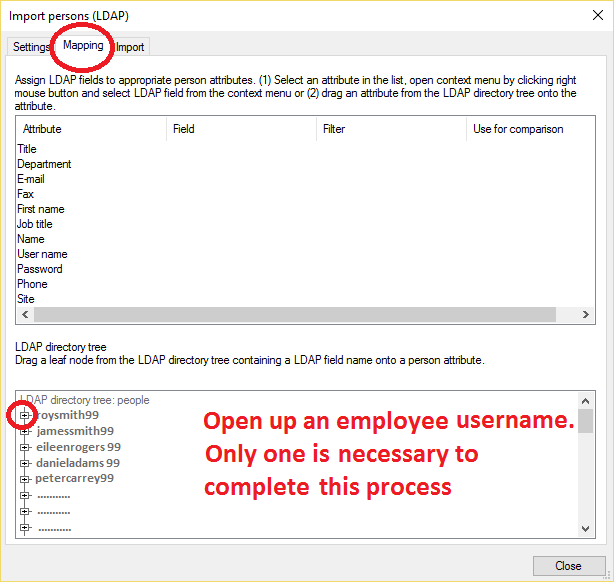
Click on “Mapping” and select just one username from the list and open it up by clicking on the “+” symbol
Step 8
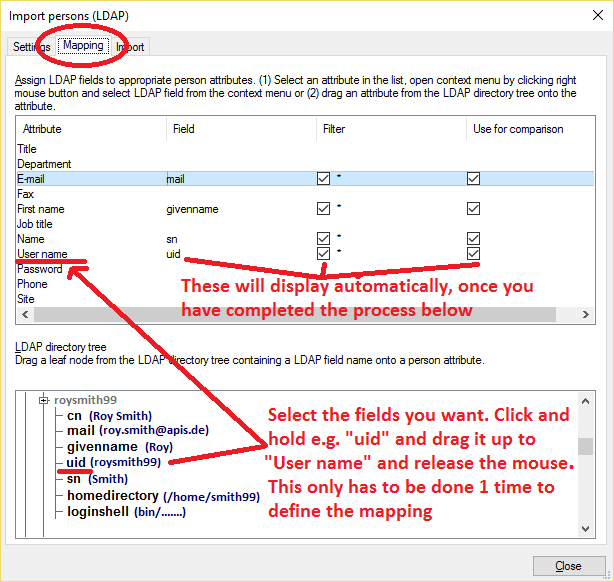
We recommend that you fill in at least the username and email, but also the first and last name. You can of course fill in every row possible, if the information is available on the LDAP Server. Simply left click and hold on e.g. “uid (username)” and drag it up to “User name”. The information to the left will automatically fill up i.e. “Field, Filter & Use for comparison”. This is the mapping process and you are deciding here which information will be transferred to “Teams and persons”. When you are done, click on “Import” at the top
Step 9

To bring up the list click “Find”. The list will show up with the information of the rows you selected in “Mapping”. We selected: Email, first name, last name, username. Then chose the persons you want to be transferred to “Teams and persons” and then click “Import”.
Step 10
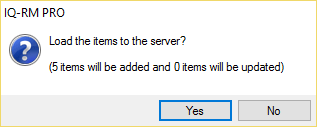
This dialog will display, informing you how many usernames will be added. If this is not your first time importing data from the LDAP server, you may update user’s information as well.
Step 11
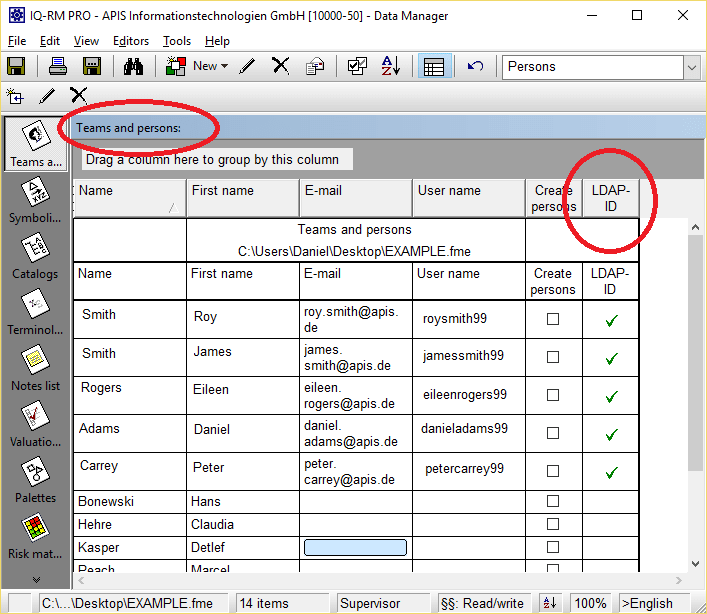
Here you will see your newly imported list in “Teams and persons”
Step 12
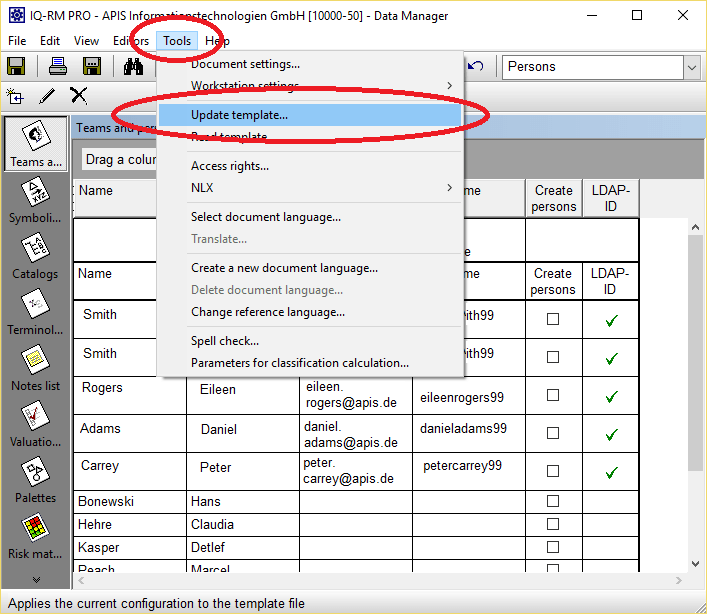
Update your template file by clicking on “Tools | Update template”. If you create a new FME file in the future on this workstation (or network, if you have a network license), these usernames will automatically be part of the FME file.
Step 13
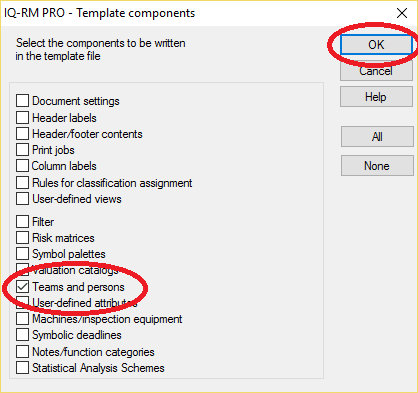
Select the box “Teams and persons” and then click on “OK”
Step 14
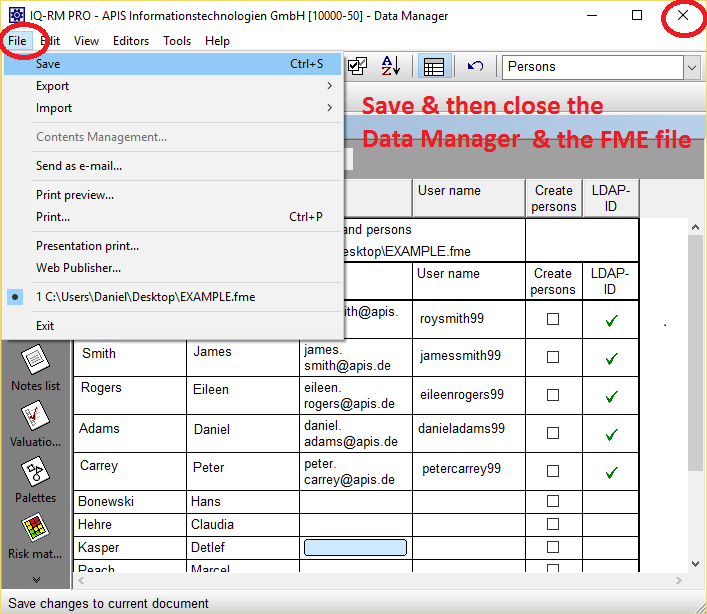
Save the changes you have made by clicking on “File | Save”. Then close both the Data Manager and the IQ Software as well, to see if your changes have been made.
Step 15
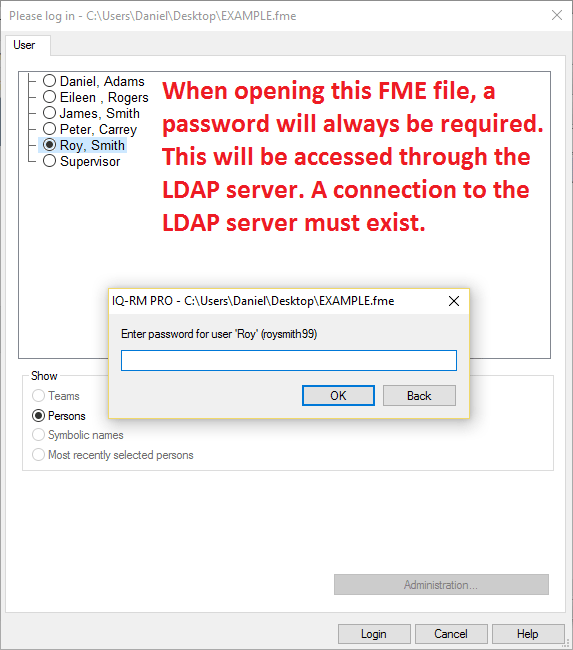
Reopen the IQ Software and open the same FME file. This dialog should appear before any changes can be made to the file. Simply inform the users of the FME file that they must now login using their company password.
There you go! More power to the administrator!
If you would like a downloadable pdf document of this post, then click here
Note: If the text appears in German and you would like Google Translate to translate the page then first select “English” on the main forum page.
Find us on: ![]() &
& ![]()